


Make your journey to India smooth by preparing for your eVisa essentials. Guarantee you have your passport, a recent photo, and a credit/debit card ready for the application. Remember to check if your country is eligible and be prepared with the necessary visa fees. Familiarize yourself with the approved entry airports and designated exit points to ease your travel. Have all your essential documents like travel itinerary and accommodation proofs on hand. By understanding these crucial points, you’ll be well-prepared to navigate the Indian Evisa process seamlessly.
Key Takeaways
- Check approved entry airports and seaports for Evisa holders.
- Verify designated exit points and procedures for smooth departure.
- Gather essential visa documents: passport, photo, itinerary, and payment proof.
- Understand specific requirements for entry and exit based on travel plans.
- Contact customer support or refer to FAQs for assistance during the Evisa process.
Evisa Application Process
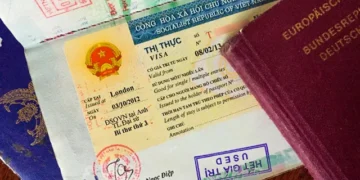
Curious about how to navigate the Indian Evisa application process efficiently? To begin, make sure you meet the application requirements, such as having a valid passport, a recent photograph, and a credit/debit card for payment. The processing time for an Indian Evisa is typically around 3-5 business days, so plan accordingly.
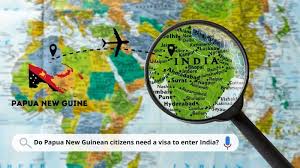
Next, check if your country is eligible for an Evisa to India. Currently, citizens of over 160 countries can apply for an Evisa, making the process accessible to many travelers.
When it comes to visa fees, they vary depending on the duration and type of visa you’re applying for. Be sure to have the necessary funds ready to cover the cost.
Approved Entry Airports
Upon receiving your Indian Evisa approval, consider the designated entry airports for your arrival into the country. When you land at one of these approved entry airports, you’ll need to go through specific arrival procedures and meet certain immigration requirements.
Additionally, familiarize yourself with the customs regulations and be prepared for security checks. Here are five key points to keep in mind:
- Make sure to have all your travel documents and Indian Evisa approval readily accessible for immigration officers.
- Follow the instructions provided by the airport authorities for a smooth entry process.
- Be aware of any restrictions on items you can bring into the country to comply with customs regulations.
- Prepare for security checks by having your belongings organized and following all security protocols.
- Stay informed about any changes in entry procedures or requirements at the designated entry airports to avoid any delays or issues during your arrival.
Designated Exit Points
When traveling to India on an e-Visa, it’s important to be aware of the designated exit points. These points are specific locations where you can leave the country.
Understanding the exit procedures overview and having the necessary exit documents ready will guarantee a smooth departure from India.
Exit Point Locations
You can find the designated exit points for your Indian eVisa departure at the official government website. When planning your exit from India, it’s important to be mindful of the available exit point options and the corresponding exit point regulations set by the Indian authorities.
Here are some key exit point locations to take into account:
- Indira Gandhi International Airport (DEL): Located in New Delhi, this major airport offers international departures.
- Chhatrapati Shivaji Maharaj International Airport (BOM): Situated in Mumbai, it serves as a significant exit point.
- Kempegowda International Airport (BLR): Serving Bangalore, this airport is another viable exit option.
- Rajiv Gandhi International Airport (HYD): Located in Hyderabad, it provides international departure services.
- Chennai International Airport (MAA): Situated in Chennai, this airport is a convenient exit point for southern India travelers.
Ensure you review the specific regulations and requirements for your chosen exit point to facilitate a smooth departure process.
Exit Procedures Overview
To smoothly exit India through the designated exit points, familiarize yourself with the specific exit procedures at each location. When departing from Indian eVisa Airports, make sure you go through customs clearance before heading to the baggage claim area. It is vital to follow the instructions provided by airport authorities to avoid any delays in your departure process.
The table below summarizes the exit procedures at the major Indian airports:
| Airport | Customs Clearance Procedure | Baggage Claim Process |
|---|---|---|
| Delhi | Form submission & inspection | Collect luggage from designated carousel |
| Mumbai | Declaration form submission | Retrieve bags from conveyor belts |
| Bangalore | Red & Green channel system | Proceed to baggage claim area |
| Chennai | Customs declaration form | Claim baggage from designated area |
Required Exit Documents
Understanding the essential exit documents needed at designated exit points in India is crucial for a smooth departure process. When preparing to leave the country, make sure you have the following items in order to complete the exit formalities smoothly as per Indian Visa DOCUMENTS REQUIRED guidelines.
- Valid Passport: Make certain your passport is valid for at least six months beyond your intended departure date.
- Exit Visa: If your visa requires an exit permit, ensure to obtain it before heading to the exit point.
- Customs Declaration Form: Fill out any required customs declaration forms accurately.
- Boarding Pass: Keep your boarding pass handy for security checks and boarding the flight.
- Proof of Payment for Duties: If you’ve made any purchases subject to duties, have the proof of payment ready.
Mandatory Document Checklist
It’s important to have all the essential visa documents ready before your journey to India.
Make sure to check the departure point requirements to avoid any last-minute hassles.
Having a complete mandatory document checklist will help streamline your travel process smoothly.
Essential Visa Documents
Make sure you have all the mandatory visa documents ready before applying for your Indian eVisa. When preparing your essential visa documents, keep in mind the visa validity and photo requirements. Here are the key items you need to have:
- Passport: Make certain your passport is valid for at least six months from the date of arrival in India.
- Photograph: Have a recent passport-size photograph with a white background that meets the specified dimensions.
- Travel Itinerary: Provide details of your travel plans, including flight bookings and accommodation arrangements.
- Proof of Accommodation: Present evidence of where you’ll be staying during your visit, such as hotel reservations.
- Payment Confirmation: Keep a record of your eVisa fee payment confirmation, which is required for processing your application efficiently.
Having these essential visa documents in order will streamline your Indian eVisa application process and help you avoid any delays or complications.
Departure Point Requirements
Before starting on your journey, make sure you have the following mandatory documents ready at your departure point. It’s important to be aware of the exit point regulations and traveler tips to guarantee a smooth departure process. Departure procedures and airport guidelines vary, so being prepared is key.
Firstly, have your valid passport with at least six months of validity remaining from your intended date of departure. This is a fundamental requirement at all departure points.
Additionally, make sure you have a printed copy of your Indian eVisa approval letter. This document will be checked before you can board your flight.
Furthermore, remember to carry your return ticket or onward journey ticket. This is a common requirement to demonstrate that you’ll be leaving the country within the stipulated time frame.
Tips for Smooth Processing
To guarantee a smooth processing experience, it’s crucial to carefully review and accurately fill out all required information on your Indian Evisa application.
Here are some tips to help you navigate the process seamlessly:
- Verify Travel Insurance: Make sure you have valid travel insurance that covers your trip to India.
- Check Currency Exchange Rates: Familiarize yourself with the current currency exchange rates to have an idea of the value of the Indian Rupee.
- Double-Check Application Details: Review your application multiple times to avoid any errors or discrepancies.
- Keep Supporting Documents Handy: Have all necessary supporting documents ready to upload during the application process.
- Contact Customer Support if Needed: In case of any doubts or issues, don’t hesitate to reach out to the Indian Evisa customer support for assistance.
Frequently Asked Questions
If you have any queries regarding the Indian Evisa application process, refer to the following frequently asked questions for clarification.
One common concern is about the visa extension process. If you wish to extend your stay in India beyond the eVisa’s validity period, you must apply for an extension at the Foreigners Regional Registration Office (FRRO) in India. It’s crucial to initiate this process well in advance of your current eVisa’s expiration date to avoid any overstay penalties.
Another frequently asked question relates to visa application fees. The eVisa fees vary depending on the applicant’s nationality and the type of eVisa (tourist, business, medical, etc.) being applied for. These fees are non-refundable, even if the application is rejected. Make sure to double-check the fee structure before submitting your eVisa application to avoid any payment-related issues.
Frequently Asked Questions
Can I Apply for an Indian Evisa if I Have a Criminal Record?
Yes, you can apply for an Indian eVisa with a criminal record. However, visa eligibility may vary based on the offense. Make sure you understand the legal implications and disclose all relevant information during the application process.
Is It Possible to Extend My Evisa While in India?
Yes, you can extend your eVisa while in India. The visa extension process involves meeting specific requirements and ensuring your eVisa is still valid. Contact the relevant authorities for guidance on the extension procedure and necessary documentation.
Are There Any Specific Dress Codes to Follow When Visiting India?
When visiting India, it’s crucial to respect traditional attire and cultural norms. Make sure your clothing is modest, especially when visiting religious sites. Follow local customs and wear appropriate attire to show cultural sensitivity.
Can I Use My Indian Evisa for Multiple Entries?
Yes, your Indian eVisa allows multiple entries within its validity period. However, be mindful of the visa duration and entry restrictions. Make sure you adhere to the guidelines to avoid any issues during your travels.
Are There Any Restrictions on the Types of Activities Allowed on an Evisa in India?
You can explore a variety of cultural experiences in India with your eVisa. However, there are restrictions on certain activities like journalism and missionary work. Make sure you comply with all travel regulations during your visit.
Conclusion
Now that you have all the information you need for your Indian eVisa application, you’re ready to start on your journey to this incredible destination. Remember to have all your required documents in order, choose an approved entry airport, and familiarize yourself with the designated exit points.
By following these guidelines, you’ll guarantee a smooth and hassle-free process for your eVisa approval. Have a wonderful trip to India!


