


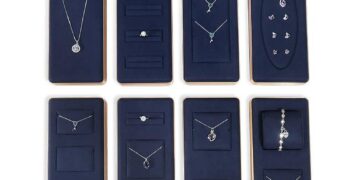


The size and shape will directly affect how your jewelry looks, how you utilize your display space and how easily customers can browse. If the jewelry display trays are too small will crowd pieces, making them appear unorganized. One that is too large will waste room and make your collection look sparse. A wrong-shaped tray can hide details and make it difficult to arrange certain jewelry types. Here’s a guide on how to choose sizes and shapes for your jewelry, brand, and space.
1. Start by determining the type of jewelry you have: size & shape for specific pieces
Your tray should be customized to your jewelry. Each type of jewelry has its own dimensions and display requirements. These recommendations are a good place to start:
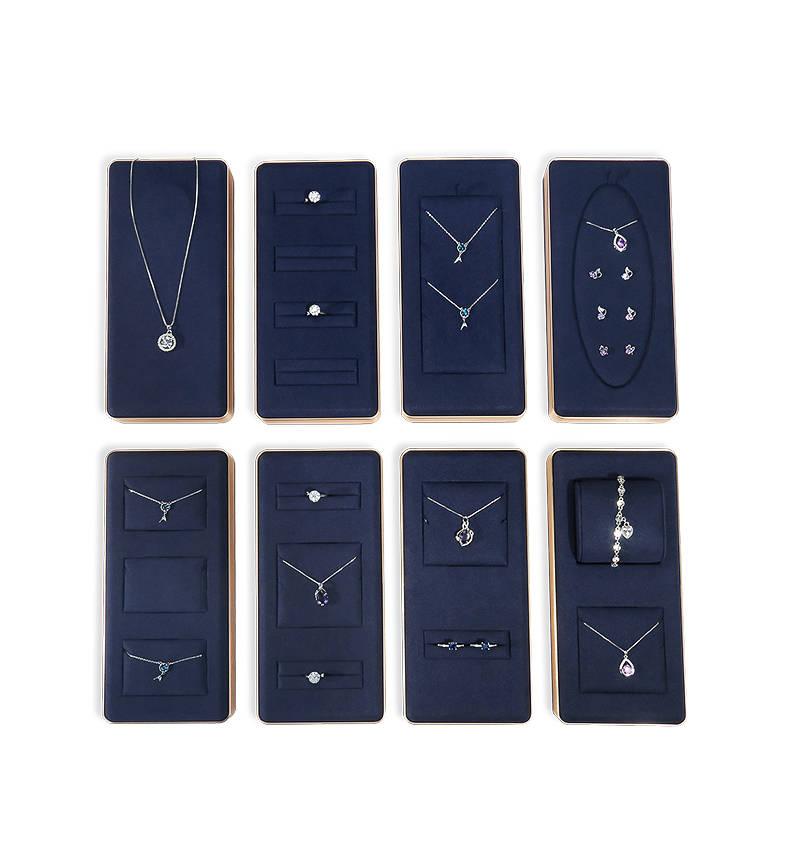
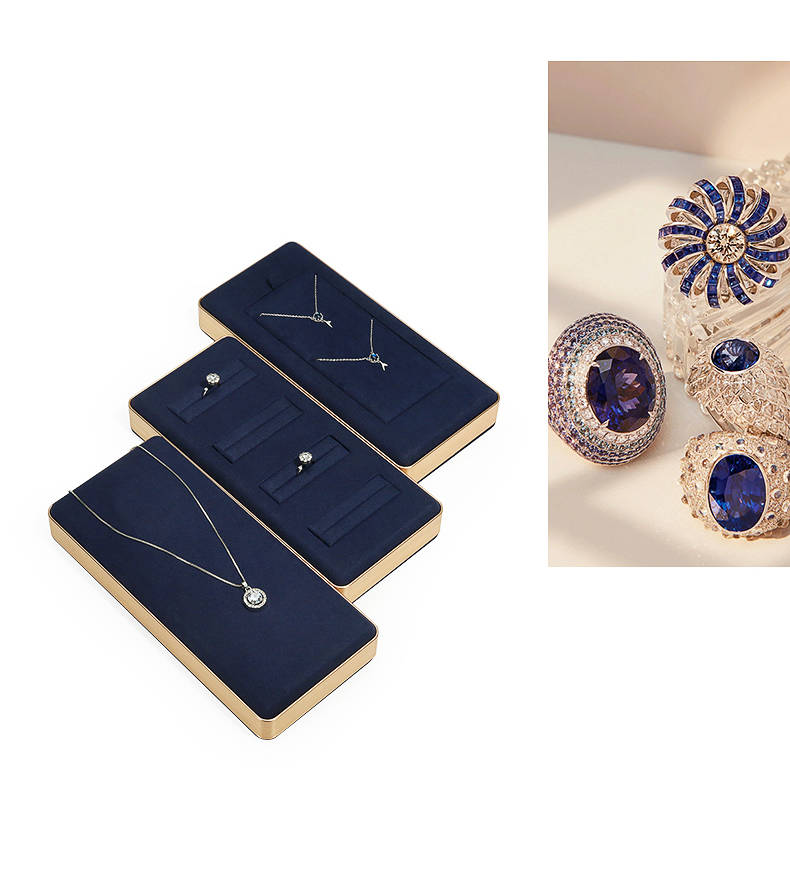
A. Rings: Compact, Small Trays with Precise Compartments
Although rings are small, they require a well-organized spacing to prevent them from tangling and hiding designs.
- Size Guidelines:
- Ring trays are available in sizes ranging from 8×6 to 12×8. They’re small enough to fit into corners of glass cases or on countertops, but big enough to hold between 10-20 rings depending on the compartment size.
- Choose circular or square compartments (16mm-22mm) that will fit most ring band sizes. Slots 25mm-30mm in width are recommended for statement rings, such as cocktail rings.
- Shape Recommendations:
- Rectangular: Ring trays are most commonly rectangular. They stack easily, fit into display cases and can be arranged in rows. Ideal for shops with organized, linear displays (e.g. minimalist or luxury boutiques).
- Round or oval: A fun alternative for fashion or bohemian stores. Round trays can add visual interest to counter displays. They are also ideal for small rings collections (5-10 pieces). Avoid using large round trays to display rings, as they can be difficult to reach the pieces at the center.
B. Earrings: Size and Shape based on Earring Type
Since earrings come in many styles (studs and hoops to dangles and statement pieces), the tray shape/size will depend on your style.
- Studs or Small Hoops:
- Size: 6×8 to 10×8 in. – compact enough to be grouped with other small jewelry, e.g. rings. But roomy enough to hold 12-24 pairs.
- Shape : Rectangular or square. Square trays are great for mixing and matching with other square trays to create a modular display.
- Dangle or Statement Earrings:
- Size: 10×12 to 14×10–deeper trays (1.5 to 2 inches high) are recommended to prevent long dangles hanging over the edge.
- Shape: rectangular with long, narrow compartments to separate dangles or shallow rectangular trays. Avoid round trays, as they can cause earrings to tangle and swing.
C. Necklaces and Pendants: Long, Shallow Trays to Measure Length
Long necklaces, especially, need trays to accommodate their length.
- Size Guidelines:
- To prevent them from sliding, cut the necklaces at 12×8 inches (0.5-1 inch high) so that they are shallow (0.5-1 inches tall).
- If you have medium/long neckties (18-24 inches), use trays that are 16×10 to 20×12 in size. This is long enough to allow the necklaces to be laid flat. You can find trays that have hooks built in or one long compartment.
- Statement necklaces (bulky with large pendants), 14×10–larger compartments (3-4 inch wide) that will fit the pendant comfortably.
- Shape Recommendations:
- Rectangular: The only practical shape for necklaces–lengthwise alignment keeps chains straight. Avoid using square or round trays, as they force the necklaces to fold and hide details.
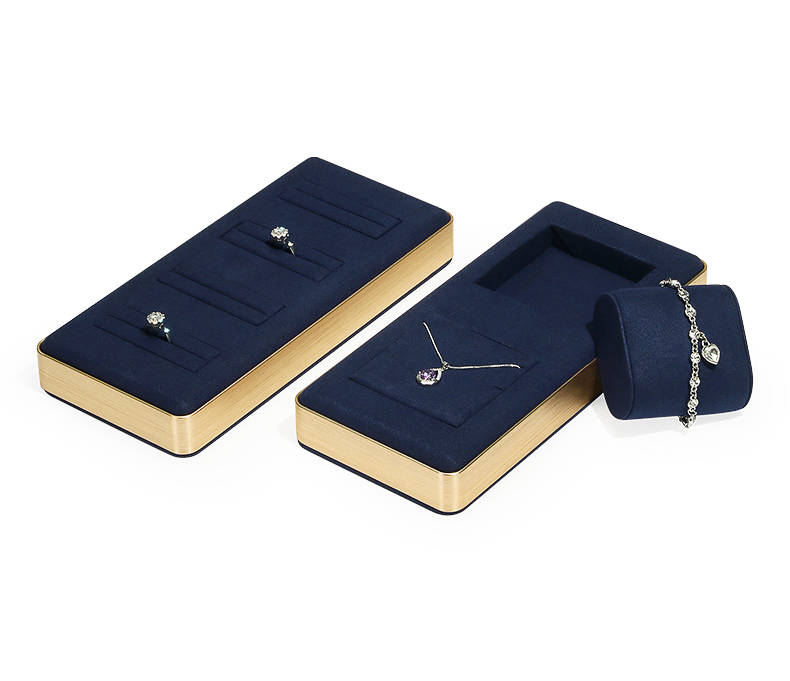
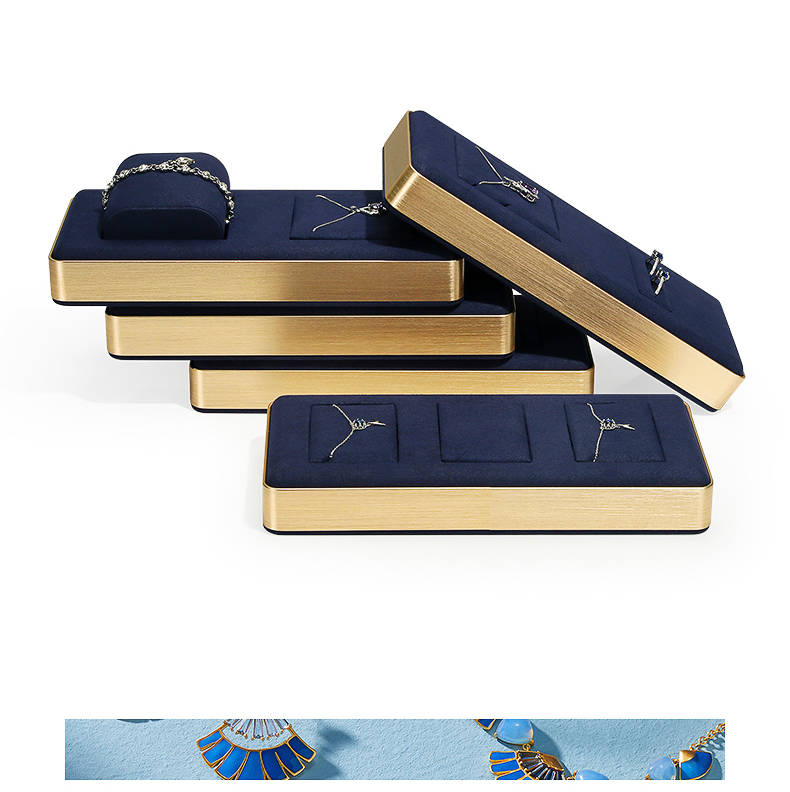
D. Bracelets and Bangles: Wide, deep Trays to Stabilize
Bracelets, especially rigid bangles, need enough space to be seated securely in the tray without sliding.
- Size Guidelines:
- For thin bracelets, (chain or beaded) 10×8–shallow (1″ tall) with dividers that separate 8-12 pieces.
- To prevent bangles from falling over, use a 12×10 inch to 14×10 inch–deep (1.5-2 inches high). Compartments need to be at least 2-3 inches wide. (Big enough to hold 3-4 stacked bracelets).
- Shape Recommendations:
- Square tray (for small collections). : A 10×10 inch rectangular tray is ideal for displaying 6-8 bangles.
2. The size of the tray should match your display space
The maximum tray size will be determined by the display area available (countertops or glass cabinets, or wall units). To avoid purchasing trays that are too large or leave gaps, measure your space before buying.
A. Countertop Displays
Countertops should be designed to maximize space while allowing customers to interact with them.
- For small counters (24-36 inch long), use trays between 8×6 and 12×8. Avoid overcrowding by sticking to a maximum of 2-3 trays. If necessary, stack trays (use risers for height without blocking vision).
- Mix medium and small trays (from 12×8 to 16×10 inch) for Medium Counters. To maximize space, arrange them in “staggered patterns” (e.g. a necklace tray at one end, bracelets in the middle and rings on the other).
- Large counters (48+ inch long): Use large trays (16×10 to 20×12) for statement pieces or necklaces, and smaller trays for earrings/rings. To avoid a cluttered appearance, leave 2-3 inches between trays.
B.
The dimensions of glass cases (wall-mounted and freestanding) are fixed. Trays must fit into the case’s width, depth.
- For wall-mounted cases (typically 12-18″ deep), use shallow trays (0.5-0.81″) to avoid the case looking bulky. Trays need to be 10-14″ wide (to fit standard case widths), and 6-8″ deep (to allow for the glass doors to close).
- For freestanding cases (18-24 inches deep), use trays that are at least 1-2 inches high. Choose trays that are 12-16 inches wide. They will allow you to display multiple items, but still let your customers see the back.
C. Portable Displays (Craft Fairs, Trade Shows)
Trays for portable setups (tables and folding racks) are limited in space. They must be lightweight, stackable, and the right size to fit into your carrying case.
- Craft Fair Tables (6-8 ft long and 2-3 ft wide): Use trays that are easily stackable (10×8 to 12×10 in.). To avoid overcrowding, aim for 4-6 total trays (e.g. 2 ring tray, 2 earring tray, 1 necklace tray and 1 bracelet tray).
- For small booths (10x10ft) compact trays (8×6 to 10×8 in) are the best. To add height to your booth without taking up additional floor space, use stackable trays and tiered stands.
3. Consider the Customer Experience: Visibility and Accessibility
The size and shape of a tray should allow customers to easily view and handle the jewelry. Customers who are frustrated by difficult-to-reach items can lose sales.
- Avoid using large trays for small jewelry: A tray 16×12 inches filled with tiny studs will make customers lean or search to find the pieces. This is not convenient. Small jewelry should be kept in smaller trays (8×6 inch) to make it easier for customers to reach.
- Deep trays for delicate pieces : Choose trays that are 1.5-2 inches high to prevent the earrings and necklaces from falling over the edge. This will keep them safe.
- Shape for Visibility: Rectangular tray shapes are easier to arrange into rows so that customers can scan the jewelry without having to move the tray. Round trays look great but they can hide items in the middle. Reserve them for smaller, focal collections.
4. Shape as Design Element: Coordinate with Brand Aesthetics
Although functionality is first, the tray shape can be used to reinforce your brand style. Use it to add personality and flair to your displays.
- Luxury/Minimalist brands: Use clean rectangular trays that have sharp edges. This is in line with the sleek, organized aesthetic (e.g. black velvet rectangular trays at a luxury jewelry boutique). Avoid shapes that are too decorative (e.g. heart-shaped), as they can feel unrefined.
- Bohemian/Earthy brands: Combine rectangular trays and organic shapes (e.g. oval or irregular wooden tray). A wooden oval tray with beaded bracelets will add a handmade, natural touch to boho decor.
- Playful/Fashion-Forward Brands: Experiment with fun shapes (e.g., square trays with rounded corners, small hexagonal trays for earrings). For example, pastel pink hexagonal trays can add some whimsy and whimsy without overwhelming your fashion jewelry.
5. Sample Trays Tested First for Practicality
Test a sample before buying in bulk to make sure it meets your needs.
- Fit Check: Place your tray in the display area. Does it fit well without blocking any other items? The glass case’s door must be able to close completely.
- Are the pieces too crowded in your tray? Are customers able to pick up and see pieces?
- When using sample trays, test the stackability of the tray. Does it have enough weight to be transported?
Final Thoughts
When choosing the size and shape of jewelry display trays, you need to balance functionality (fitting jewelry and space), customer experience (easy browsing), and brand style. You can select trays to showcase your pieces and create a seamless shopping experience by starting with the type of jewelry, measuring the display space and prioritizing access. Remember: the best tray is one your customers won’t even notice, because it will make your jewelry shine.


